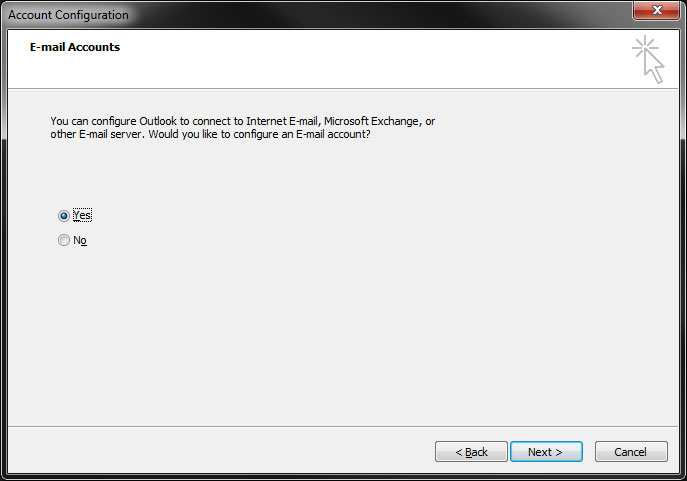
- Open Microsoft Outlook. The new account wizard will run the first time you open Microsoft Outlook. Click Next on the wizard window, then on the Email Accounts window, choose Yes and click Next.
- If the new account wizard doesn’t run when you first open Microsoft Outlook, do the following:
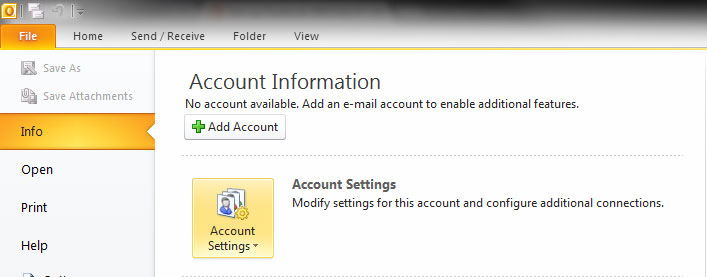
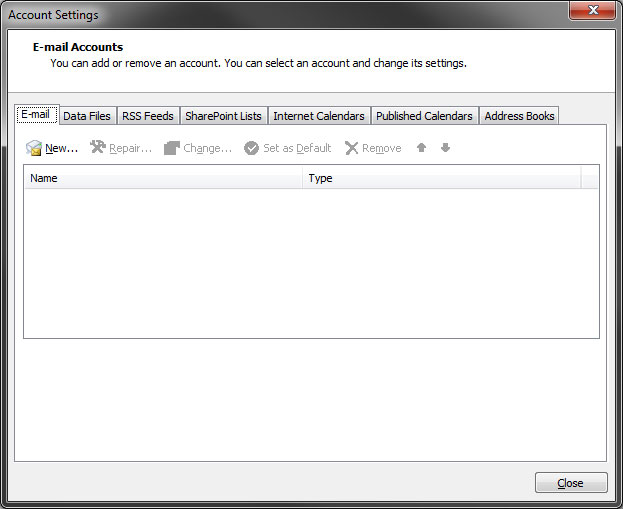
- On the File menu, click on Info and then Account Settings
- For older versions of Outlook, click on the Tools menu, and click E-Mail Accounts.
- On the E-mail Accounts window, click on the Email tab, and then click on New.
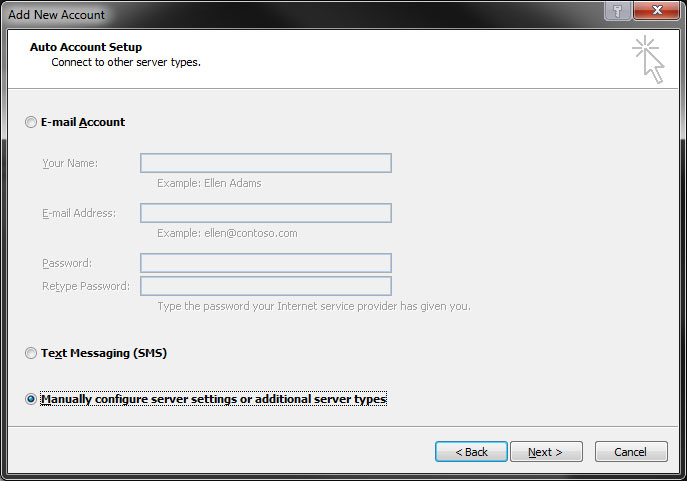
- On the Auto Account Setup window, choose Manually configure server settings or additional server types. Click Next.
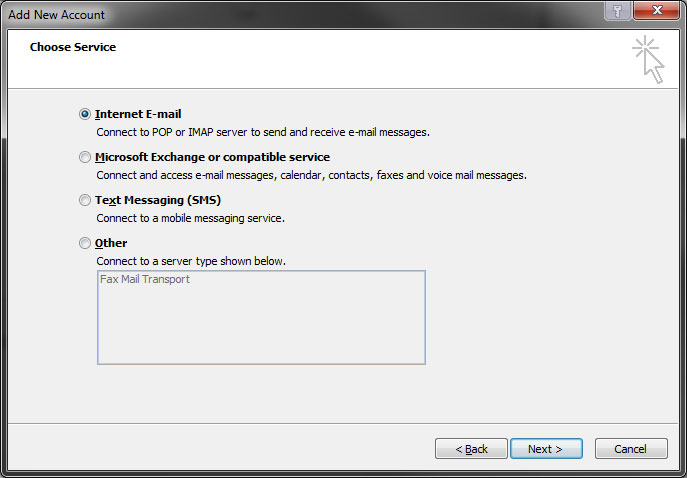
- On the Choose Service window, choose Internet E-mail. Click Next.
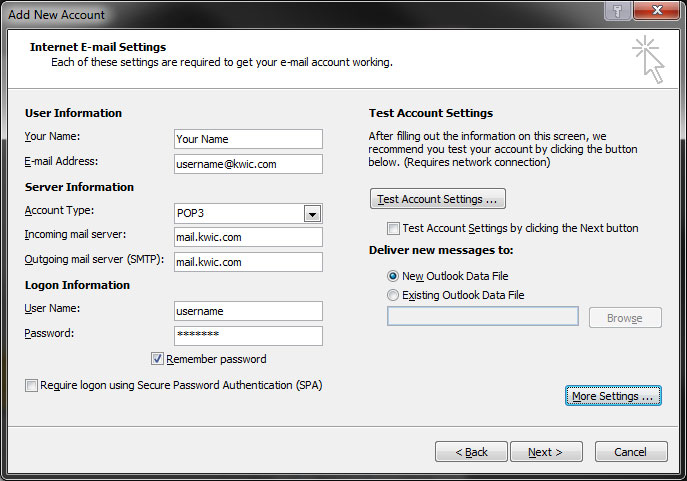
- On the Internet E-mail Settings window, do the following:
- Enter your full name and email address.
- Choose POP3 for the account type.
- Beside Incoming mail server, enter the POP3 server name.
- Beside Outgoing mail server (SMTP), enter the SMTP server name.
- Type your username and password, and choose remember this password.
- Uncheck the Test Account Settings box and then click on More Settings.
For a list of server names you would use for your particular email address, contact our support team.
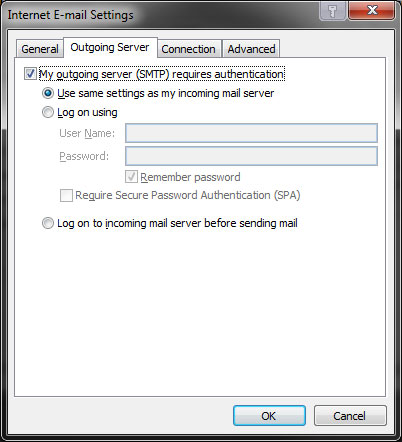
- On the Internet E-mail Settings window, choose the Outgoing Server tab, click in the box beside My outgoing server (SMTP) requires authentication to enable the checkbox.
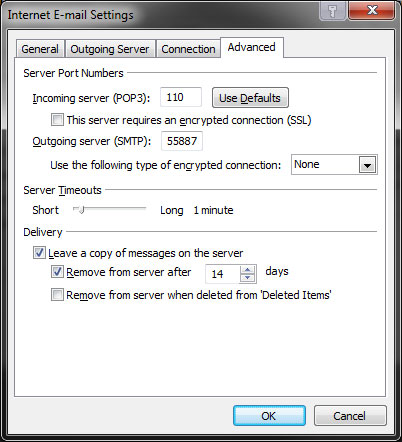
- On the Internet E-mail Settings window, choose the Advanced tab, and change the Outgoing server (SMTP) port field to 55887. Click OK, and then click Next in the previous window.
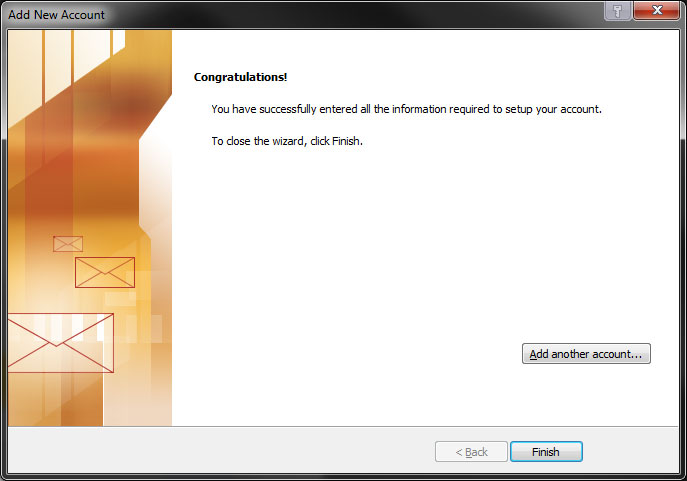
- On the Congratulations window, click Finish.