- Open Thunderbird. The Welcome to Thunderbird wizard will run the first time you open Thunderbird. Click on Skip this and use my existing email. If the Welcome to Thunderbird wizard window doesn’t run when you first open Thunderbird, do the following:
- Press the ALT key on your keyboard to show the main menu. On the Tools menu, click Account Settings.
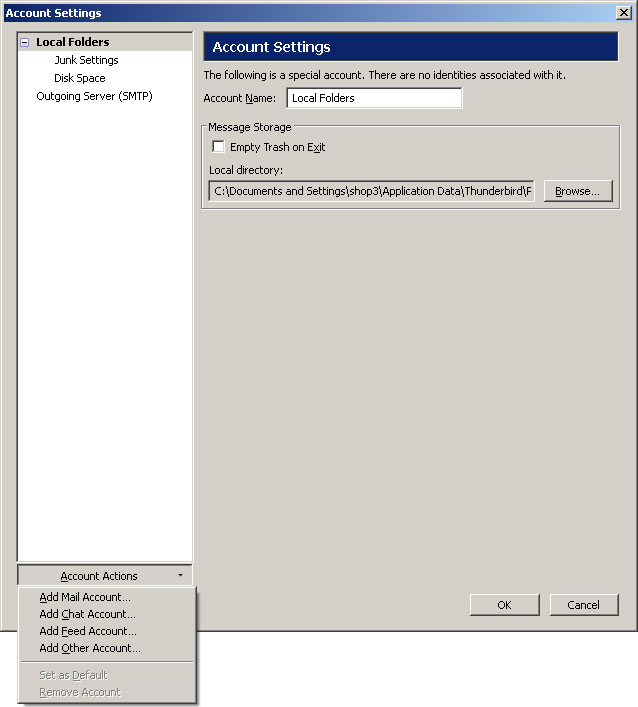
- In the Account Settings dialog box, click Account Actions, and then click Add Mail Account.
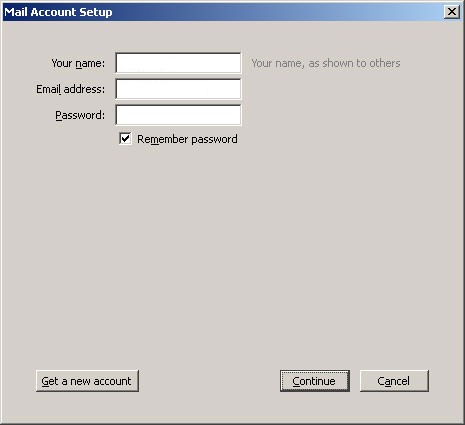
- On the Mail Account Setup window, enter your full name, email address, password, and make sure Remember password is checked. Click Continue.
- The wizard will now try to look up the configuration for your email account. At this point wait for Thunderbird to try and find the configuration, or click on Manual config.

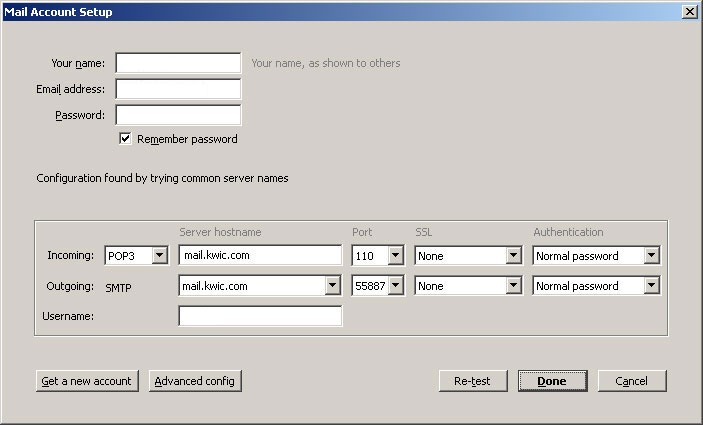
- When the server configuration information is displayed, do the following:
- In the drop-down menu beside Incoming, select POP3, enter the server hostname, change the port to 110, change SSL to None, and change Authentication to Normal password
- For the outgoing entries, enter the server hostname, click in the port number field and type 55887, change SSL to None, and change Authentication to Normal password. The username field should already be filled in for you. Click on Done
For a list of server names you would use for your particular email address, contact our support team.
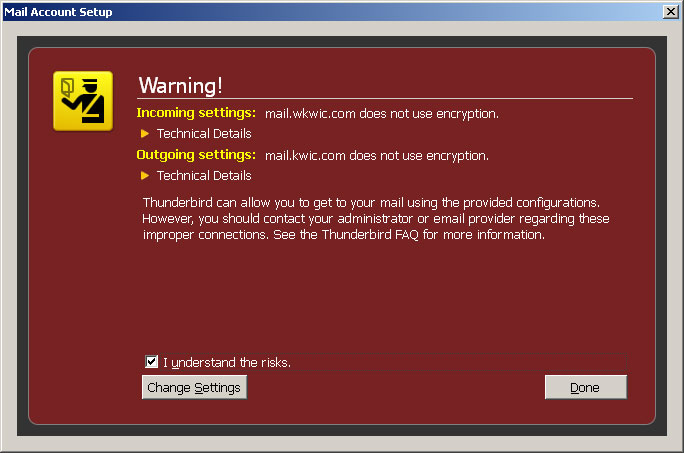
- You will then be presented with a Warning! window. Do not worry, this window is only displayed because we did not tell Thunderbird to test the account settings. Click in the I understand the risks checkbox and click on Done